7a. Initialise Excel-Flask integration using Jupyter Notebook
The backend is a Flask application that Excel communicates with over HTTP.
- Paste the following code into Jupyter Notebook
run.ipynbfile (see Figure 13). - Press Shift+Enter or Click the Run All button to execute the code and initialise the Flask back end (see Figure 13). If prompted to install ipykernel, proceed with the installation and wait for the code to execute once the installation is complete.
from mf_excel.backend. app import app
from mf_excel.backend. services. config import settings
import threading

def start_flask():
app.run(

host=settings. HOST,
port=settings. PORT,
debug=False,
use_reloader=False
)

threading. Thread (target=start_flask, daemon=True) . start()

print("MacroFrame Forecast backend running")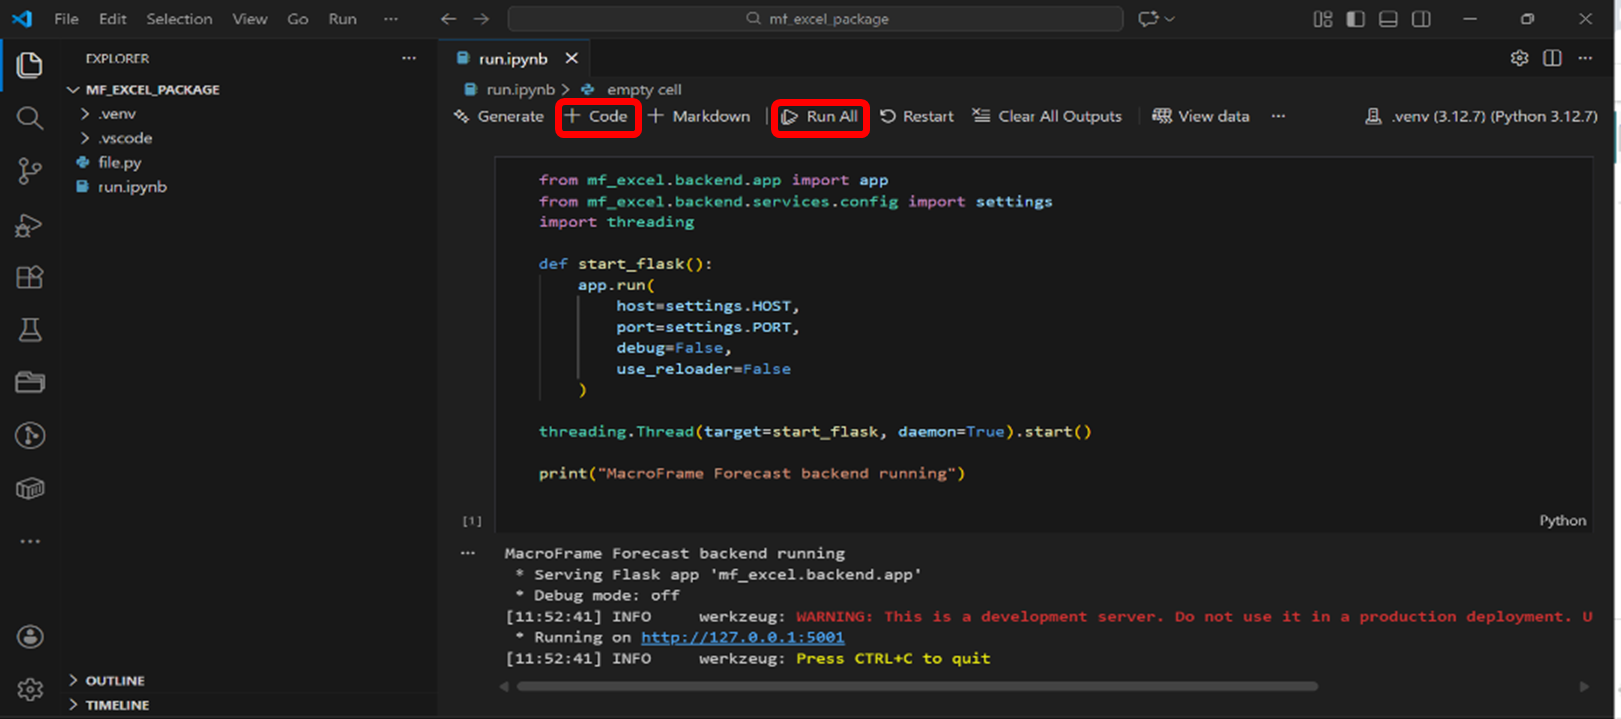
7b. Define model parameters in Excel Settings and Run Forecast
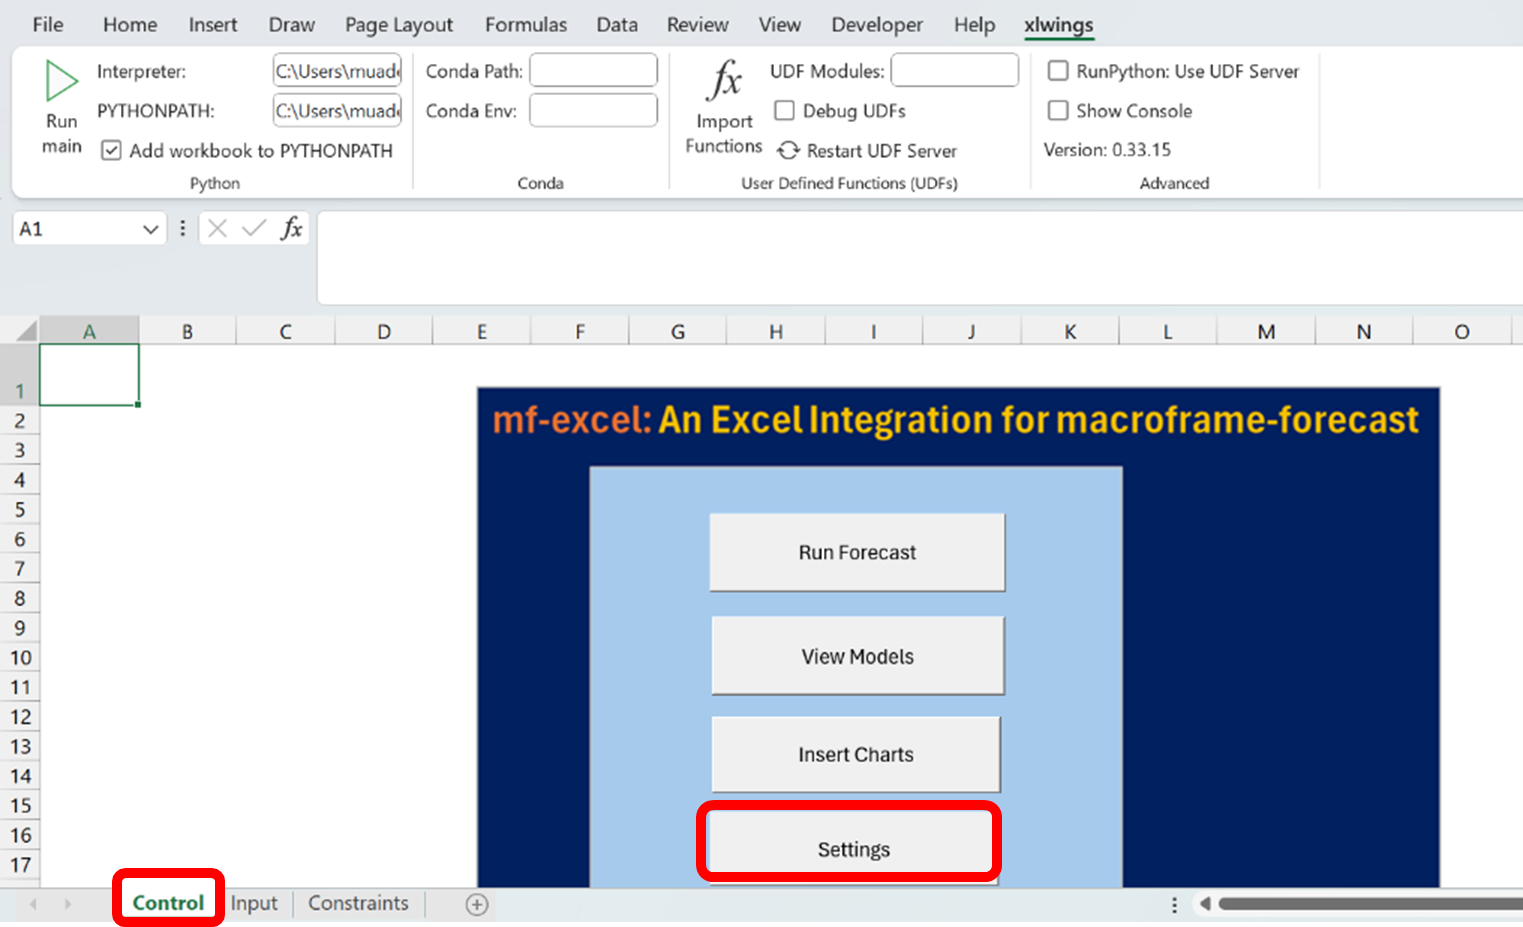
- Navigate to the Control Sheet and left-click the Settings button to open the Settings sheet (Figure 14).
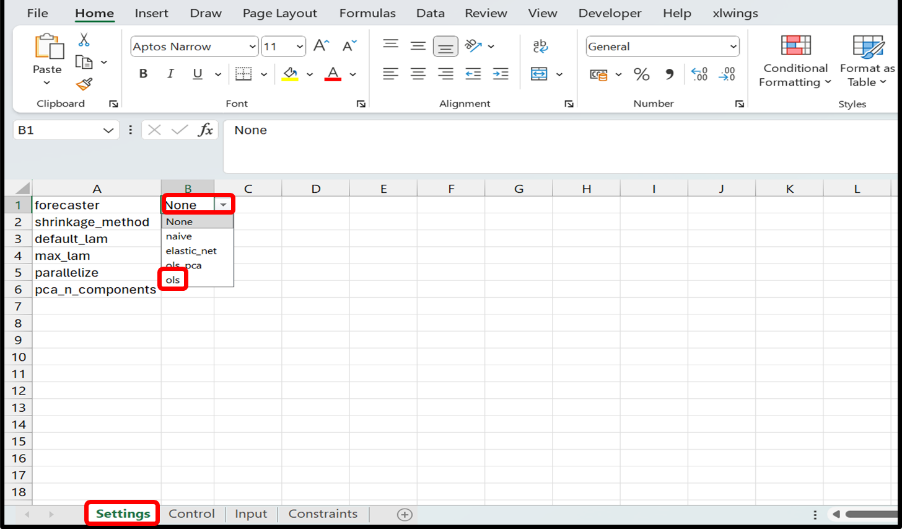
- On the Settings sheet, configure the parameters to reflect your forecasting objective. As we are replicating the output of the second example in the macroframe-forecast paper using the same fiscal data, select
olsfrom the forecaster drop‑down menu in column B (see Figure 15). - Open the Control sheet and left-click the Run Forecast button. After a successful run, new sheets will be created with forecast outputs and diagnostics.